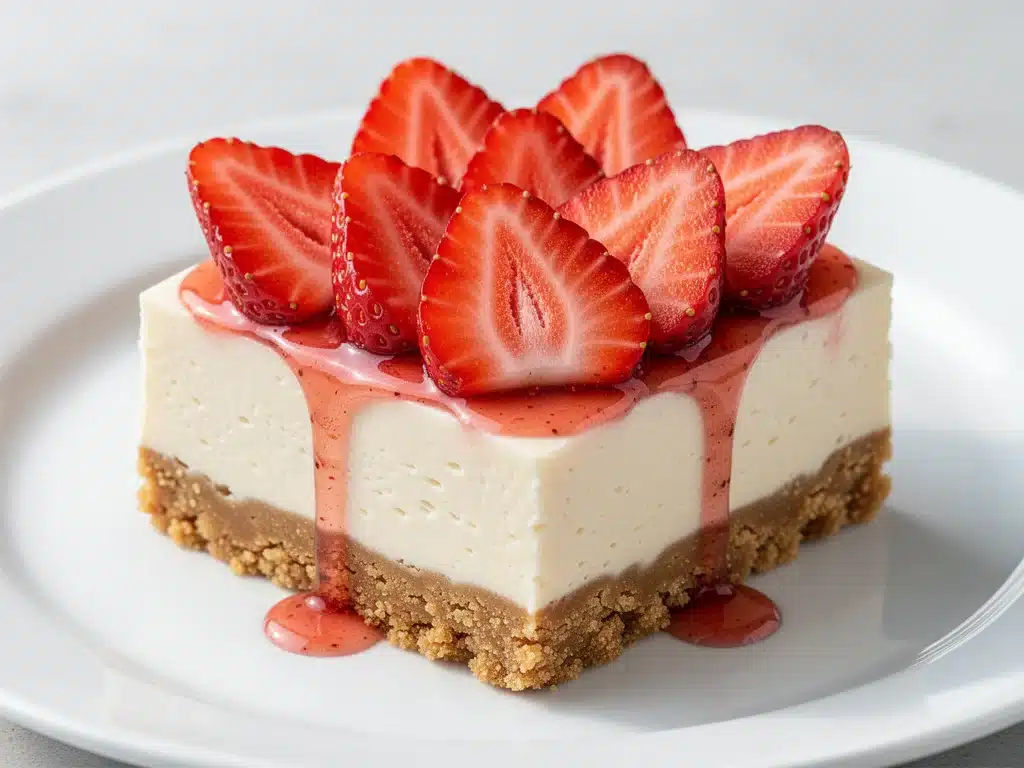
It was July of 2019. The kind of July where the pavement melts your sneakers and the air conditioner in my apartment had given up the ghost three days prior. I had decided, with the hubris of someone who had never baked anything more complex than a box brownie, that I would make a classic New York-style cheesecake for my neighbor’s BBQ.
Big mistake. I turned the oven up too high, panicked when I saw the top crack, turned it down, and then opened the door to “check” it every four minutes. Result? A sunken, cracked, slightly burnt mess that looked like a geological disaster. I ate it anyway. It tasted like guilt and dense dairy.
That night, I swore off baked cheesecakes forever. Or so I thought. A week later, desperate to make amends and still wanting something sweet to bring to the neighborhood potluck, I threw together a no-bake version in my electric mixer while sitting on my kitchen floor because the heat was unbearable. I used strawberries from the farmer’s market, some cream cheese, and a box of Oreos because I was lazy. It was creamy, cool, and didn’t require an oven.
My neighbor loved it. Actually loved it. He asked for the recipe. I made it for every gathering since. This no-bake strawberry cheesecake bar recipe has become my absolute go-to for summer. It’s cool, it’s refreshing, it doesn’t heat up the kitchen, and honestly? It’s way better than the baked version I failed at years ago.
I’ve tested this recipe about forty times now. I’ve tried graham crackers instead of Oreos (too dry). I’ve tried low-fat cream cheese (too runny). I’ve tried fresh strawberries in the crust (soggy mess). Through all the trial and error, I’ve landed on the perfect ratio. Four main ingredients. Five minutes of prep. Ten minutes of chill time before you can cut it. It’s the easiest dessert you will ever make, and it always gets compliments.
Why This Recipe Wins Every Summer
There are a hundred dessert recipes out there. Why this one? Because it solves the biggest problem with summer baking: the heat. But beyond that, here’s why I keep coming back to these bars:
Zero Oven Required — Seriously. If you have a hand mixer or a stand mixer, you can make this. No preheating, no waiting for the water bath, no anxiety about cracks. It’s just mix, press, chill, and eat. I’ve made this while hosting a dinner party because I could prep it in 10 minutes and then focus on the main course.
Uses Summer Strawberries — When berries are in season, they’re cheap and sweet. This recipe highlights that fresh flavor without cooking it away. The raw strawberry topping stays bright red and juicy, unlike baked fruit which turns brown and mushy.
Make-Ahead Friendly — This is the ultimate stress-buster. You can make these bars three days before your party. In fact, they taste better after sitting overnight because the flavors meld together. I often make them on Sunday for a Saturday BBQ.
Four Ingredients Max — I’m not exaggerating. You need cream cheese, sugar, cookies, and strawberries. That’s it. No vanilla extract (unless you want it), no gelatin, no weird stabilizers. Just real, simple ingredients that taste like dessert.
Crowd-Pleaser Factor — I’ve served these to picky toddlers and grandmothers who claim “nothing tastes like it used to.” Both groups ask for seconds. The texture is creamy but firm enough to hold its shape when cut. It’s rich but not heavy, especially on a hot day.
This is my answer to “what can I bring that’s impressive but easy?” It looks fancy because of the layers, but the work is minimal. You’ll feel like a pro, and your guests will think you spent all day in the kitchen. (You won’t.)
Ingredients You’ll Need
Here’s the best part: you probably have half of this in your pantry already. I’m not asking you to go to three different specialty stores. Here’s exactly what you need and why each part matters.
For the Crust:
Chocolate Sandwich Cookies (24 full cookies, roughly 150g crumbs) — I use Oreos. Specifically, the regular ones. Some people say graham crackers are “more authentic” for cheesecake, but I disagree. The chocolate cookie crust is sweeter, richer, and holds together better without needing too much butter. If you’re allergic to chocolate, you can use graham crackers, but you’ll need to add an extra tablespoon of sugar to the crust mix.
Unsalted Butter (4 tablespoons / 55g, melted) — This binds the crumbs. Don’t skip it, or your bars will fall apart. Use real butter, not margarine. Margarine has too much water and can make the crust soggy. I melt mine in the microwave in 15-second bursts.
For the Filling:
Full-Fat Cream Cheese (16 oz / 450g, two 8oz blocks) — This is non-negotiable. Do not use the tub “whipped” cream cheese. It has air and stabilizers that will make your filling fluffy and unstable. You need the solid blocks. Let them sit on the counter for 30 minutes before you start mixing. Cold cream cheese doesn’t whip smooth; it gets lumpy. If you rush this step, you’ll have lumpy cheesecake bars.
Granulated Sugar (½ cup / 100g) — Standard white sugar works best. It dissolves evenly. Brown sugar makes it too moist and adds a molasses flavor that clashes with the fresh strawberries. Powdered sugar is an option if you want it super smooth, but it can make the texture slightly dense. I stick with granulated.
Heavy Whipping Cream (1 cup / 240ml, cold) — This is what gives the bars their lift and airy texture. Since there’s no baking, the cream has to do the work of setting the structure. It must be very cold. If your cream is lukewarm, it won’t whip up. I keep a dedicated container of heavy cream in the fridge just for this recipe.
Fresh Strawberries (1 pint / 450g) — Look for berries that are deep red and smell sweet. Avoid any that are white or green at the stem; they’ll be sour. You need about 1 cup of sliced berries for the topping and 1 cup for mixing into the filling (optional, but I recommend it for strawberry flavor). If it’s not strawberry season, you can use frozen berries, but you must thaw and drain them completely, or your bars will be watery.
Optional but Recommended:
Lemon Juice (1 teaspoon) — A tiny splash brightens up the sweetness. It cuts through the richness of the cream cheese. I always add this.
Vanilla Extract (1 teaspoon) — Adds depth. I use pure vanilla, not imitation. If you don’t have it, skip it. The strawberries will provide enough flavor.
Equipment You’ll Need
You don’t need anything fancy. In fact, the less equipment you have, the easier cleanup is.
9×9 Inch Baking Pan — This is the standard size for bars. Line it with parchment paper leaving an overhang on the sides. This is crucial. It lets you lift the entire block of cheesecake out of the pan to slice it cleanly. Without parchment, you’ll be digging for crumbs.
Hand Mixer or Stand Mixer — A hand mixer is perfect for this. It’s easier to clean than a stand mixer for a small batch. If you have a stand mixer, use the paddle attachment. Do not try to do this by hand with a whisk. You’ll be there for an hour, and your arms will hurt. Trust me.
Food Processor or Ziplock Bag — To crush the cookies. A food processor takes 10 seconds. A rolling pin and a heavy bag takes 2 minutes. Both work. Just get the crumbs fine.
Spatula — A silicone spatula is best for scraping the bowl and folding in the whipped cream. You need to be gentle so you don’t deflate the air you just whipped into the cream.
Wire Cooling Rack — Not actually needed for cooling, but handy for setting the bowl down. The bars need to chill, not cool.
Cheese Cloth or Fine Strainer — If you’re using fresh strawberries and want to remove excess juice before topping, this helps. Not strictly necessary if you drain the berries well on a paper towel.
How to Make No-Bake Strawberry Cheesecake Bars
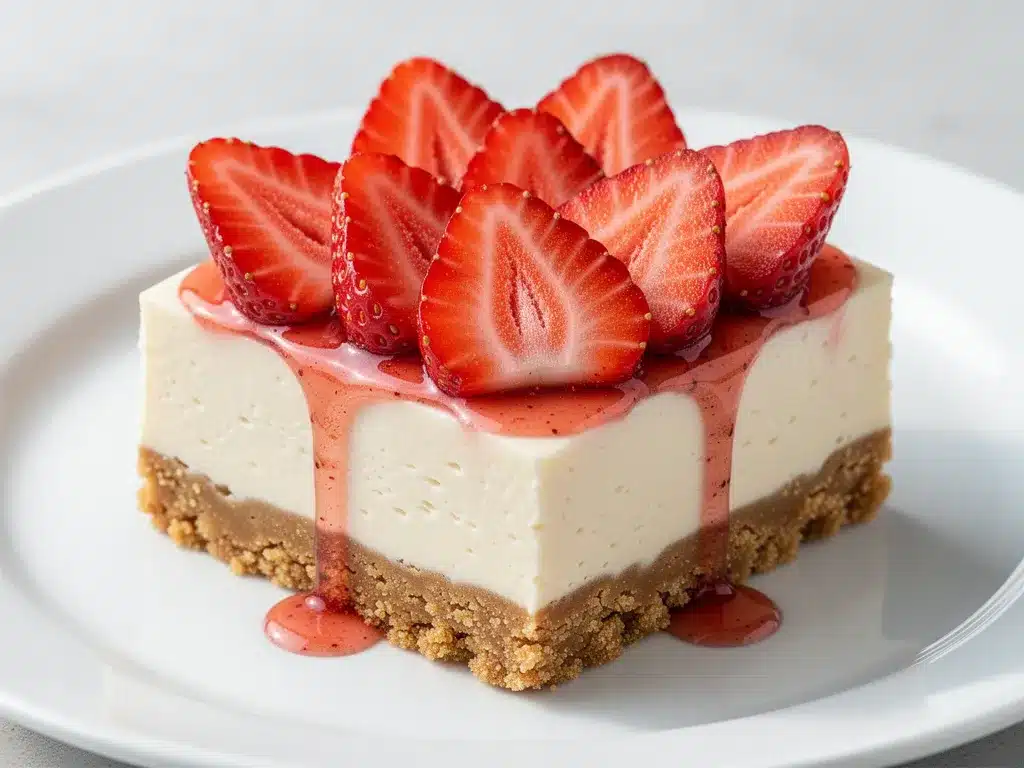
Alright, let’s make this. It’s going to be fast. I’m walking you through exactly how I do it, including the little tricks that keep the layers distinct and the texture perfect.
Step 1: Prep the Pan (2 minutes)
Line your 9×9 inch pan with parchment paper. I like to do an “X” shape—lay two strips across, one vertical, one horizontal, so all four sides have overhang. Spray it lightly with non-stick spray just to be safe. This makes removing the finished bars a breeze. If you don’t have parchment, grease the pan heavily with butter, but parchment is better.
Step 2: Make the Crust (5 minutes)
Crush your cookies into fine crumbs. If using a food processor, pulse until they look like wet sand. If using a bag, roll over them with a rolling pin until they’re fine. Pour the crumbs into a medium bowl. Add the melted butter. Stir until the crumbs look like dark, damp sand. This is your cue that it’s ready.
Pro Tip: Press the crust into the pan firmly. Use the bottom of a measuring cup to pack it down tight. If the crust is loose, your bars will crumble when you cut them. Press it into the corners and up the sides slightly if you want a little edge.
Step 3: Whip the Cream (3 minutes)
In a large bowl, pour the cold heavy cream. Beat it on medium-high speed until you see soft peaks. This means when you lift the beaters, the cream holds a shape but droops over slightly. Don’t over-whip it into butter! Stop as soon as it holds its shape.
Step 4: Mix the Filling (5 minutes)
In a separate large bowl, beat the softened cream cheese and sugar until smooth and creamy. Scrape down the sides of the bowl. This should take about 2 minutes. If you see lumps, keep beating. You want it silky.
Now, add the vanilla and lemon juice. Mix briefly.
The Fold: This is the most important step. Take about one-third of the whipped cream and beat it into the cream cheese mixture. This lightens the dense cheese. Then, gently fold in the rest of the whipped cream using your spatula. Use a “cut and fold” motion, like you’re folding a letter. Stop as soon as it’s combined. Over-mixing deflates the air and makes the filling dense.
Step 5: Add the Strawberries
Wash, hull, and slice your strawberries. Keep about 1 cup of slices for the top. Dice the rest into small chunks and fold them gently into the cheesecake batter. The small chunks distribute flavor throughout, while the slices on top look pretty.
Warning: If your strawberries are very juicy, pat them dry with a paper towel first. Excess water will make the filling runny.
Step 6: Assemble and Chill (10 minutes prep + 4 hours chill)
Pour the filling over the crust. Spread it evenly with an offset spatula or a butter knife. Tap the pan on the counter twice to release air bubbles. Arrange the reserved strawberry slices on top in a single layer. Don’t overcrowd them.
Cover the pan with plastic wrap. Place it in the refrigerator. You need at least 4 hours to set, but overnight is best. If you rush it, the bars will be soft and hard to cut.
Step 7: Slice and Serve
Once set, lift the bars out of the pan using the parchment overhang. Place on a cutting board. Use a sharp knife to cut into squares. For clean cuts, wipe the knife with a damp cloth between each cut. This prevents strawberry juice from smearing across the bars.
Expert Tips for Perfect Bars
I’ve made these dozens of times. Here’s what I’ve learned to ensure they turn out perfectly every single time.
Cream Cheese Temperature is Key
I can’t stress this enough. If your cream cheese is cold, you will have lumps. If you try to microwave it to speed things up, you might melt it too much, and it won’t hold the whipped cream. Take it out of the fridge 30-45 minutes before you start. If you’re in a rush, cut it into small cubes and microwave in 5-second bursts, checking often. It should be soft to the touch but still solid.
Don’t Skip the Chill Time
I know it’s tempting to eat it right away. But the structure relies on the fat in the cream cheese and cream solidifying. If you cut it too soon, it will be a puddle. If you’re hosting a party, make these the day before. They actually taste better after 24 hours because the cookie crust softens slightly and melds with the filling.
Strawberry Selection Matters
Use the ripest strawberries you can find. If they’re sour, your dessert will taste tart. If they’re overripe and mushy, they’ll turn brown. Aim for firm, bright red berries. If you’re making these in winter when berries are dry, consider adding a tablespoon of strawberry jam to the filling for extra flavor.
Cutting for Clean Edges
Use a long, sharp chef’s knife. Dip it in hot water and wipe it dry before every cut. This helps the knife slice through the cold cream cheese cleanly. If you just push down with a dull knife, you’ll squash the layers.
Storage Life
These bars keep well in the fridge for up to 5 days. Store them in an airtight container. If you don’t have one big enough, cover the pan tightly with plastic wrap. They do not freeze well because the texture of the whipped cream changes when thawed. Keep them cold.
Variations and Substitutions
Once you’ve nailed the basic version, here are some ways I like to mix it up. I’ve tried all of these, and they all work.
Vanilla Bean Version
Skip the strawberries entirely. Use vanilla bean paste or extract in the filling. Top with fresh raspberries or blackberries. This is great for spring.
Chocolate Chip Cookie Crust
Use chocolate chip cookies instead of Oreos. The chips melt slightly into the crust, creating little pockets of chocolate. Very rich.
Graham Cracker Crust
If you prefer a traditional cheesecake flavor, swap Oreos for graham crackers. You’ll need about 1 ½ cups of crumbs. Add 1 tablespoon of brown sugar to the crumbs for sweetness. This version is less sweet overall.
Mini Cupcakes
You can make this in a muffin tin! Press crust into liners, fill with batter, and chill. Makes for cute individual portions. Great for parties.
Gluten-Free Option
Use gluten-free chocolate cookies. Most major brands make GF Oreos. The rest of the ingredients are naturally gluten-free. Just check your cream cheese label to ensure no cross-contamination if you’re celiac.
Dairy-Free Version
This is trickier. Use coconut cream (the thick part from a can of full-fat coconut milk) instead of heavy cream. Use vegan cream cheese blocks (like Kite Hill or Miyoko’s). Use dairy-free cookies. The texture will be slightly different—more like a mousse—but it’s still delicious.
Serving and Storage
These bars are versatile. Here’s how I serve them to keep everyone happy.
How to Serve
I usually serve them chilled, straight from the fridge. They’re cool and refreshing. I garnish with a mint leaf and a dusting of powdered sugar if I’m feeling fancy. For casual gatherings, I just leave them in the pan with a few extra berries on top.
Side Dishes
These bars are rich, so they don’t need much. A simple green salad with a light vinaigrette balances the meal. I also serve them with black coffee or tea. The bitterness cuts the sweetness perfectly.
Wine Pairing
If you’re having wine, a crisp Sauvignon Blanc or a Rosé works well. Avoid sweet wines; they’ll make the dessert taste cloying.
Storage Instructions
Refrigerator: Store in an airtight container for up to 5 days. The berries may release some juice over time, which is normal. Just serve with a spoon.
Freezing: I don’t recommend freezing these. The whipped cream separates when thawed, and the texture becomes grainy. It’s not worth the risk. Make fresh for best results.
Meal Prep: These are perfect for meal prep. Make them on Sunday, cut them into squares, and store in individual containers. Grab one for dessert during the week. They stay fresh all week long.
Nutrition Information
I’m not a nutritionist, but here’s the breakdown if you’re tracking. Keep in mind that these are rich, creamy bars, so portions matter.
Per Serving (based on 16 bars):
- Calories: 280
- Protein: 4g
- Carbs: 32g
- Fiber: 1g
- Sugar: 24g
- Fat: 16g
- Saturated Fat: 10g
What’s Good:
- Calcium from the cream cheese
- Antioxidants from the strawberries
- No baked goods, so no potential acrylamide concerns
What to Know:
- High in sugar and saturated fat
- Contains dairy and gluten (unless modified)
- Calorie-dense due to cream cheese and cream
My Take:
Look, this is a dessert. It’s meant to be indulgent. It’s not a health food. But it’s better than store-bought pastries because you control the ingredients. When I make these, I use high-quality cream cheese and fresh berries, which makes a difference. Enjoy a square or two, savor it, and move on. Life’s too short for sad desserts.
Final Thoughts
So that’s my no-bake strawberry cheesecake bar recipe! I know I’ve talked a lot about it, but when you find a recipe that just works, you get excited. This has saved me more summer parties than I can count. It’s my answer to “what’s for dessert?” when I’m tired, it’s hot outside, and I still want to impress my friends.
Make it yours! Try different berries, swap the cookies, add a drizzle of chocolate. The best recipes are the ones you adapt. If you make these, drop a comment and let me know how they turned out. I love hearing from you. And if something doesn’t work, tell me—I’m here to help.
Happy baking (well, no-baking)! And I hope your kitchen stays cool and your dessert game stays strong.
Frequently Asked Questions
Can I use frozen strawberries?
Yes, but you must thaw and drain them completely. Frozen berries release a lot of water. If you skip the draining step, your cheesecake filling will be runny and won’t set. Pat them dry with paper towels and let them sit in a strainer for an hour before using.
Why did my cheesecake bars not set?
Usually, this means you didn’t chill them long enough, or your cream cheese was too warm. Make sure you chill for at least 4 hours, preferably overnight. Also, ensure your heavy cream was cold when you whipped it. If the cream wasn’t stiff, it won’t support the weight of the cheese.
Can I make this in a springform pan?
Absolutely. A 9-inch springform pan works great. Just line it with parchment paper so the sides don’t stick. The baking time and method are the same. Just be careful when releasing the spring, as the bars are delicate.
How long do these last in the fridge?
They last up to 5 days in the refrigerator. After that, the berries may start to break down and the texture might change. For best quality, eat within 3 days.
Can I add whipped cream on top?
You can, but it’s not necessary. The filling is already light and airy. If you want a garnish, a dollop of fresh whipped cream with a berry on top looks pretty. But the bars are good as-is.
What if I don’t have a mixer?
You can do it by hand, but it will take effort. You’ll need a strong whisk and a lot of arm muscle. Beat the cream cheese and sugar vigorously until smooth. Whip the cream by hand until stiff peaks form (this takes longer). Then fold gently. It’s possible, just tiring.
Can I use low-fat cream cheese?
I don’t recommend it. Low-fat cream cheese has more water and stabilizers, which can make the filling watery and less creamy. Full-fat is the key to that rich, cheesecake texture. If you must use low-fat, add a tablespoon of cornstarch to help thicken it.
Pin This Recipe!
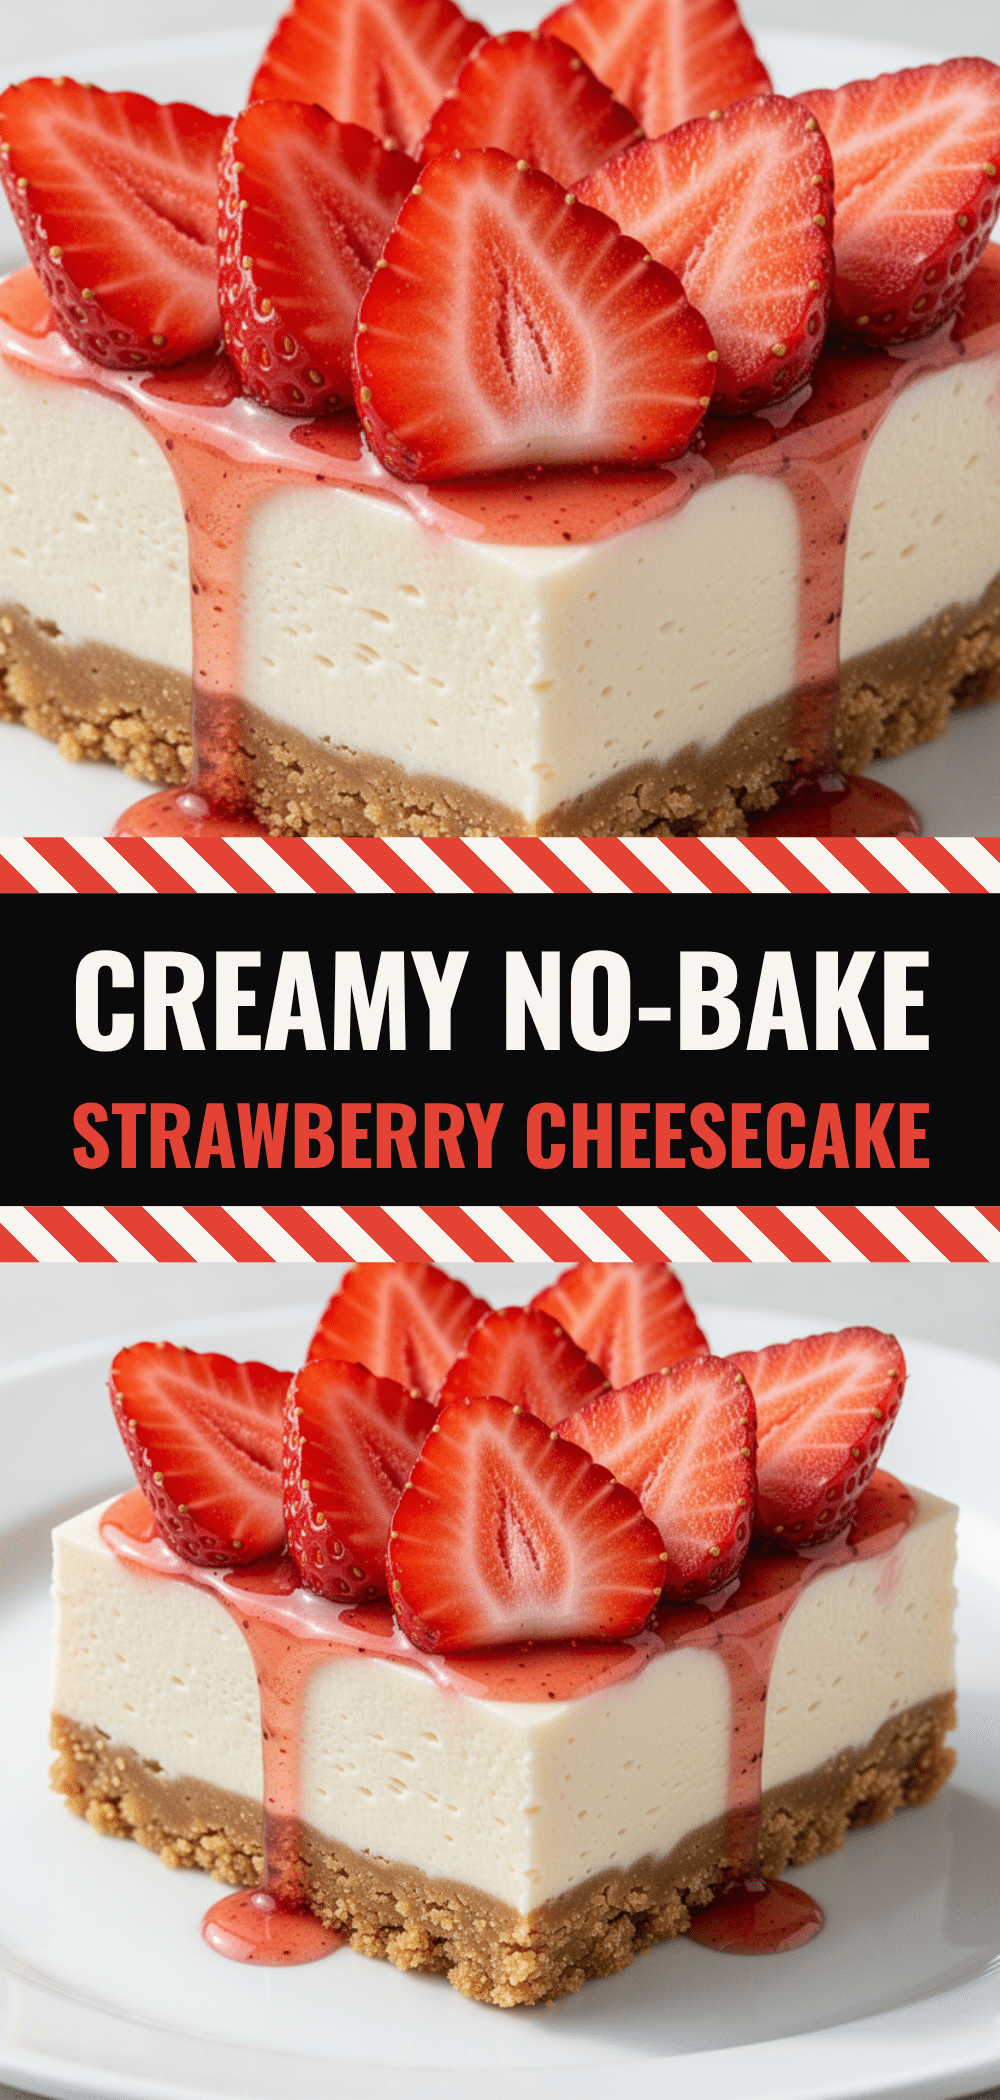
No-Bake Strawberry Cheesecake Bars: 4-Ingredient Summer Dessert
- Total Time: 4 hours 15 minutes
- Yield: 16 servings 1x
Description
A creamy, refreshing no-bake dessert featuring a chocolate cookie crust, rich cream cheese filling, and fresh strawberries. This easy summer treat requires only four main ingredients and minimal prep time.
Ingredients
- 24 chocolate sandwich cookies (Oreos), roughly 150g crumbs
- 4 tablespoons unsalted butter, melted
- 16 oz full-fat cream cheese (two 8oz blocks), softened
- ½ cup granulated sugar
- 1 cup heavy whipping cream, cold
- 1 teaspoon vanilla extract (optional)
- 1 teaspoon lemon juice (optional)
- 1 pint fresh strawberries (450g), sliced and diced
Instructions
- Line a 9×9 inch baking pan with parchment paper, creating an overhang on the sides for easy removal.
- Crush the chocolate cookies into fine crumbs using a food processor or a rolling pin in a ziplock bag.
- Mix the cookie crumbs with the melted butter until the texture resembles wet sand.
- Press the crust mixture firmly into the bottom of the prepared pan, packing it down tight.
- In a large bowl, beat the cold heavy cream on medium-high speed until soft peaks form.
- In a separate large bowl, beat the softened cream cheese and sugar until smooth and creamy.
- Mix in the vanilla extract and lemon juice (if using).
- Lighten the cream cheese mixture by beating in one-third of the whipped cream, then gently fold in the remaining whipped cream using a spatula.
- Fold in the diced strawberries into the filling, reserving the sliced strawberries for the top.
- Pour the filling over the crust and spread evenly.
- Arrange the reserved strawberry slices on top in a single layer.
- Cover the pan with plastic wrap and refrigerate for at least 4 hours, preferably overnight, until set.
- Lift the bars out of the pan using the parchment overhang and cut into squares with a sharp knife.
Notes
Ensure cream cheese is softened but not melted to avoid lumps. Heavy cream must be very cold to whip properly. Chill for at least 4 hours for clean cuts. Do not freeze as the texture may become grainy. If using frozen strawberries, thaw and drain completely to prevent a watery filling.
- Prep Time: 15 minutes
- Cook Time: 0 minutes
- Category: Dessert
- Cuisine: American
Nutrition
- Serving Size: 1 bar
- Calories: 280
- Sugar: 24
- Fat: 16
- Saturated Fat: 10
- Carbohydrates: 32
- Fiber: 1
- Protein: 4
Keywords: no-bake cheesecake, strawberry dessert, summer recipe, easy dessert, 4-ingredient recipe, chocolate cookie crust, make-ahead dessert


