
It was 7:15 AM on a Tuesday in September, and I was standing in my kitchen in a state of pure panic. My oldest was hunting for a clean pair of socks, my youngest was crying because his backpack was “too heavy” (it contained exactly one pencil and a half-eaten granola bar), and I realized with sinking dread that I had forgotten to pack lunch AND breakfast. I had maybe four minutes before the car needed to be in the driveway. I opened the pantry, stared at a bag of oats, a jar of peanut butter, and a sad-looking container of protein powder, and thought, “There has to be a better way than this chaos.”
That was the day I stopped trying to make “healthy” breakfasts that took 30 minutes to prep, and I started making these Back to School Protein Cookie Dough Bites. I’ve made them hundreds of times since then—sometimes when I’m actually rushing out the door, sometimes when I’m just lazy on a Saturday. They are the reason I don’t have to buy gas station pastries anymore, and they are the reason my kids actually eat something with protein before they sprint off to the bus stop.
If you’re drowning in morning routines, you need this recipe. It’s not just a snack; it’s my emergency brake for chaotic mornings. These cookie dough bites are no-bake, require zero cooking skills, and taste like dessert. But here’s the secret: they’re packed with protein and fiber, so they actually keep you full until lunch. I’ve tested this recipe with different flours, different nut butters, and different protein powders, and I’ve finally nailed down the version that doesn’t taste like chalk or cardboard. Let me show you how to make your mornings less stressful and your breakfasts actually delicious.
Why You’ll Love This Recipe
I know what you’re thinking. “Another protein ball? I’ve tried them before and they taste like dry sponges.” I get it. I’ve thrown away plenty of failed experiments. But these Back to School Protein Cookie Dough Bites are different. They’re chewy, they’re sweet, and they don’t require a stand mixer or a trip to the store for weird ingredients. Here’s why this recipe has completely changed our morning routine:
- Zero Cooking Required — Seriously. No oven, no stove, no mess. If you can mix ingredients in a bowl, you can make this. I’ve made these while holding a toddler on my hip. It’s that simple.
- Ready in 5 Minutes — The active time is literally 5 minutes. The rest is just chilling in the fridge. This is crucial for back-to-school mornings when every second counts. You can prep a batch on Sunday night, and in the morning, you just grab two or three and go.
- Actually Tastes Like Cookie Dough — This is the big one. Most protein snacks taste like health food. These taste like the good stuff. The oats and nut butter create a soft, chewy texture, and the chocolate chips make it feel like a treat. My kids think they’re getting away with something.
- Packed with Protein — Each bite has about 5-7 grams of protein, depending on the powder you use. That’s huge for a morning snack. It stabilizes blood sugar and keeps the brain fog away until first period.
- Pantry-Friendly Ingredients — You probably have most of this already. Oats, nut butter, honey, protein powder, chocolate chips. If you have these, you have breakfast covered for the week.
- Meal Prep Champion — These keep for up to two weeks in the fridge or three months in the freezer. I make a double batch every Sunday. It’s the one thing I can do on Sunday that saves me all week.
This recipe is my answer to “What’s for breakfast?” when I’m tired, stressed, and running late. It’s reliable, it’s tasty, and it proves that healthy eating doesn’t have to be complicated or boring.
Ingredients You’ll Need
Here’s the best part: the ingredient list is short. Like, “I don’t need to go to the store” short. But I am particular about a few things, so pay attention to the notes below. Getting these details right is what separates a good protein ball from a great one.
For the Base:
Old-Fashioned Rolled Oats (2 cups / 160g) — Do not use instant oats. They’re too fine and will make the dough sticky and gummy. Do not use steel-cut oats. They’re too hard. Old-fashioned is the sweet spot. If you need gluten-free, make sure your oats are certified gluten-free.
Peanut Butter (½ cup / 128g) — I use natural creamy peanut butter. The kind where the oil separates is fine, but stir it well before measuring. If you have a nut allergy, sunflower seed butter or almond butter works great. Avoid “whipped” peanut butter with hydrogenated oils; it changes the texture.
Honey (⅓ cup / 113g) — Honey acts as the binder. It’s sticky and sweet. Maple syrup works too, but it’s thinner, so you might need a bit more oats. Agave nectar is another option, but honey gives the best chew.
Vanilla Extract (1 teaspoon) — Pure vanilla, please. I know it’s pricey, but the synthetic stuff tastes chemical in these. It adds that classic cookie dough flavor.
For the Protein & Structure:

Vanilla Protein Powder (1 scoop / about 30g) — This is the game-changer. I recommend whey or casein blend for the best texture. Whey isolate can make them a bit dry if you use too much, so stick to one scoop. Casein makes them thicker. I use a neutral or vanilla whey-casein blend. If you use chocolate protein powder, reduce the chocolate chips by half.
Chia Seeds (2 tablespoons / 15g) — Optional, but I highly recommend them. They add fiber and omega-3s, and they help absorb excess moisture so the bites hold their shape. If you don’t have chia, you can skip them, but the texture will be slightly softer.
Salt (¼ teaspoon) — Never skip the salt. It balances the sweetness and makes the peanut butter flavor pop. Use fine sea salt.
For the Fun Part:
Mini Chocolate Chips (½ cup / 85g) — Mini chips are better here because they distribute evenly. Regular chips are fine, but you might get a huge chunk in one bite. Dark chocolate chips or semi-sweet work well if you want less sugar. White chocolate chips are delicious too, but sweeter.
Optional Add-ins:
I sometimes add a handful of mini M&Ms for kids, or crushed pretzels for a sweet-salty kick. You can also add flaxseed meal for extra fiber. But honestly, the basic version is perfect.
Shopping Tip: I buy my oats in bulk, my peanut butter in the large jar (it’s cheaper per ounce), and my protein powder when it’s on sale. These ingredients last a long time, so stock up.
Equipment Needed
You don’t need fancy gadgets for this. Here’s what I actually use. If you don’t have these, don’t worry—there are easy swaps.
Large Mixing Bowl — I use a 4-quart stainless steel bowl. It needs to be big enough to mix everything comfortably. A small bowl will make a mess.
Spatula — A silicone spatula is best for scraping the bowl. You want to get all the sticky bits. I have a cheap one from IKEA that works perfectly.
Measuring Cups and Spoons — Standard stuff. I use the nesting metal set. It’s accurate and durable.
Cookie Scoop or Tablespoon — For portioning. I use a small ice cream scoop (about 1 tablespoon size). It makes uniform bites. If you don’t have one, just use a tablespoon and roll them by hand.
Baking Sheet — To line with parchment paper while the bites chill. Any standard sheet pan works.
Parchment Paper — To line the baking sheet. This prevents sticking and makes cleanup a breeze. Wax paper works in a pinch, but parchment is better for non-stick.
Airtight Container — For storage. I use glass containers with locking lids. They keep the bites fresh and don’t absorb odors.
Food Processor (Optional) — If you want finer, more uniform bites, you can pulse the oats in a food processor before mixing. I usually just leave them whole for a chewier texture.
Tool Tip: Don’t have a cookie scoop? Wet your hands with a little water before rolling the balls. The mixture is sticky, and wet hands prevent it from sticking to your skin.
How to Make It: Step-by-Step
Alright, let’s make this! It’s incredibly simple, but there are a few tricks to get the texture right. I’m walking you through exactly how I do it.
Step 1: Prep Your Ingredients (2 minutes)
Before you start, measure everything out. I know it seems like extra work, but it makes the mixing process smooth. If you measure while mixing, you’ll end up with sticky hands and uneven ingredients. Grate your nut butter if it’s stiff, and make sure your honey is at room temperature so it pours easily.
Step 2: Mix the Wet Ingredients (1 minute)
In your large mixing bowl, combine the peanut butter, honey, and vanilla extract. Stir them together with a spatula until smooth. If the peanut butter is too thick, microwave it for 10 seconds to soften it. You want a smooth, creamy base. This ensures there are no lumps of nut butter in the final product.
Step 3: Add the Dry Ingredients (1 minute)
Add the oats, protein powder, chia seeds, and salt to the wet mixture. Stir well. The mixture will look dry and crumbly at first. This is normal. Keep stirring until everything is combined and the mixture starts to come together. It should look like wet sand.
Step 4: Fold in the Chocolate Chips (30 seconds)
Gently fold in the mini chocolate chips. Be careful not to overmix at this stage. You just want them distributed evenly. If you mix too much, you might crush the chips or make the dough too dense.
Step 5: Chill the Dough (15-30 minutes)
This is the most important step. Cover the bowl with plastic wrap or a lid and put it in the fridge for at least 15 minutes. If you’re in a rush, 15 minutes is enough. If you have time, 30 minutes is better. Chilling firms up the peanut butter and oats, making the dough much easier to roll. Do not skip this step, or you’ll end up with a sticky mess.
Step 6: Roll the Bites (5 minutes)
Once the dough is chilled, take it out. Scoop out about 1 tablespoon of dough at a time. Roll it between your palms to form a ball. If the dough is sticky, wet your hands slightly. Place the balls on a parchment-lined baking sheet. You should get about 20-24 bites.
Step 7: Store and Enjoy
Once all the bites are rolled, you can eat them immediately or store them. They taste best after they’ve chilled for a few hours, but I’ve never been able to wait that long. Just grab one and go.
Total Time: About 20 minutes (5 minutes active, 15 minutes chilling)
Troubleshooting:
- Dough is too sticky: Add 1-2 more tablespoons of oats. Or chill it longer.
- Dough is too dry: Add 1 teaspoon of water or milk. Or add a bit more honey.
- Bites are falling apart: You didn’t chill them long enough, or you didn’t use enough binder. Next time, chill for 30 minutes.
Expert Tips & Tricks
Here’s everything I’ve learned from making these dozens of times. These tips will save you from my mistakes.
The Protein Powder Matters
Not all protein powders are created equal. Whey isolate tends to be drier, while casein is thicker. I recommend a blend. If you use pure whey, you might need to add a splash of milk or water. If you use casein, the dough will be very thick, so you might need more honey. Start with one scoop and adjust as needed.
Don’t Overmix
Once you add the oats, mix just until combined. Overmixing can make the bites dense and tough. You want them chewy, not rubbery.
Use Mini Chocolate Chips
I can’t stress this enough. Mini chips distribute evenly. If you use regular chips, you’ll get a huge chunk in one bite and none in the next. It’s about balance.
Chill Time is Key
I know it’s tempting to roll them immediately, but chilling is crucial. It firms up the fats and makes the oats absorb the moisture. This prevents the bites from falling apart in your bag.
Make a Double Batch
These freeze beautifully. Make a double batch on Sunday, freeze half, and keep half in the fridge. It’s the ultimate meal prep hack. Just thaw them in the fridge overnight or eat them frozen (they taste like ice cream sandwiches).
Variations & Substitutions
Once you’ve nailed the basic version, here’s how you can mix it up. I’ve tried all of these.
Almond Butter Version
Swap peanut butter for almond butter. It’s slightly sweeter and has a more delicate flavor. I love this with dark chocolate chips.
Chocolate Peanut Butter
Use chocolate protein powder and chocolate peanut butter. Double the chocolate chips. This is for serious chocolate lovers.
Trail Mix Style
Add ¼ cup of chopped nuts (walnuts, pecans) and ¼ cup of dried fruit (cranberries, raisins). This adds crunch and chew.
Gluten-Free
Use certified gluten-free oats and make sure your protein powder is GF. Everything else is naturally GF.
Dairy-Free
Use plant-based protein powder (pea or soy) and ensure your chocolate chips are dairy-free. Most mini chips are, but check the label.
Nut-Free
Use sunflower seed butter or soy butter. Most schools are nut-free, so this is a great option for packed lunches.
Serving & Storage
How to Serve:
I usually serve these straight out of the fridge. They’re best cold and firm. You can also let them sit at room temperature for 5 minutes if you prefer them softer. I pack them in a small container for lunch or grab them for breakfast on the go.
Side Dishes:
These go great with a piece of fruit (apple slices, banana) or a glass of milk. They’re also delicious with a cup of coffee.
Storage Instructions:
Refrigerator:
Store in an airtight container for up to 2 weeks. They stay fresh and chewy.
Freezer:
Store in a freezer-safe bag or container for up to 3 months. Thaw in the fridge overnight or eat frozen. They taste amazing frozen.
Room Temperature:
I don’t recommend leaving them out for more than 2 hours, especially in hot weather. The nut butter can go rancid, and the texture will soften too much.
Pro Tip:
If you’re meal prepping, portion them into single-serving bags for the week. It makes grab-and-go even easier.
Nutrition Information
I’m not a nutritionist, but here’s the breakdown if you’re tracking. Note that this varies based on the specific brands of protein powder and nut butter you use.
Per Serving (1 bite, based on 20 bites):
– Calories: 110
– Protein: 5-7g
– Carbs: 12g
– Fiber: 2g
– Sugar: 6g
– Fat: 5g
– Saturated Fat: 1g
– Cholesterol: 0mg
– Sodium: 50mg
What’s Good:
– Decent protein for a snack
– Good fiber from oats and chia
– No added refined sugars (just honey and chocolate chips)
What to Know:
– Calories can vary based on nut butter brand
– Check your protein powder for added sugars
My Take:
“Look, these are a treat. They have chocolate chips and honey. But they’re also packed with protein and fiber, which makes them a balanced snack. They’re way better than a granola bar with 20 grams of sugar. When I’m tracking macros, I count them as a snack or a light breakfast. They’re a smart choice for busy mornings.”
Final Thoughts
So that’s my go-to Back to School Protein Cookie Dough Bites! I’ve probably talked your ear off at this point, but when you make a recipe this often, you have a lot to say about it. These bites have saved my mornings more times than I can count. They’re my answer to “What’s for breakfast?” when I’m tired, stressed, and running late. My kids are happy, I’m happy because I’m not stressed about cooking, and we’re all fueled up for the day.
Make it yours! Try different nut butters, swap in your favorite chocolate chips, or add some extra mix-ins. The best recipes are the ones you adapt to your family’s tastes. If you make this, drop a comment and let me know what you think! I love hearing how recipes turn out in your kitchen. And if something doesn’t work, tell me that too—I’m here to help troubleshoot.
Happy cooking! And I hope your mornings feel half as easy as mine do now.
Frequently Asked Questions
Can I use almond butter instead of peanut butter?
Yes! Almond butter works great. It’s slightly sweeter and has a milder flavor. You might need a tiny bit more honey if the almond butter is less sweet than peanut butter. Sunflower seed butter is also a good option for nut-free schools.
Why are my bites too sticky?
Usually, this means you didn’t chill the dough long enough, or you didn’t use enough oats. Try chilling the dough for 30 minutes. If they’re still sticky, add 1-2 more tablespoons of oats. Wetting your hands before rolling can also help.
Can I make these ahead for the week?
Absolutely! This is the best part. Make a batch on Sunday, store them in the fridge for up to 2 weeks, or freeze them for up to 3 months. I make a double batch every Sunday so I’m set for the whole month.
Do I have to use protein powder?
You can skip it, but they won’t be as high in protein. If you skip it, add 2 more tablespoons of oats to compensate for the missing bulk. They’ll still taste good, but they’ll be more like energy balls than protein bites.
Can I freeze these?
Yes! They freeze beautifully. Store them in an airtight container or freezer bag for up to 3 months. Thaw in the fridge overnight or eat them frozen. They taste like little ice cream bites.
What if I don’t have a cookie scoop?
Use a tablespoon. Just scoop out a tablespoon of dough and roll it into a ball with your hands. If it’s sticky, wet your hands with water first. It takes a bit longer, but it works fine.
Can I use maple syrup instead of honey?
Yes, but it’s thinner. You might need to add 1-2 more tablespoons of oats to absorb the extra liquid. Honey is stickier, so it binds better. But maple syrup works in a pinch.
Pin This Recipe!
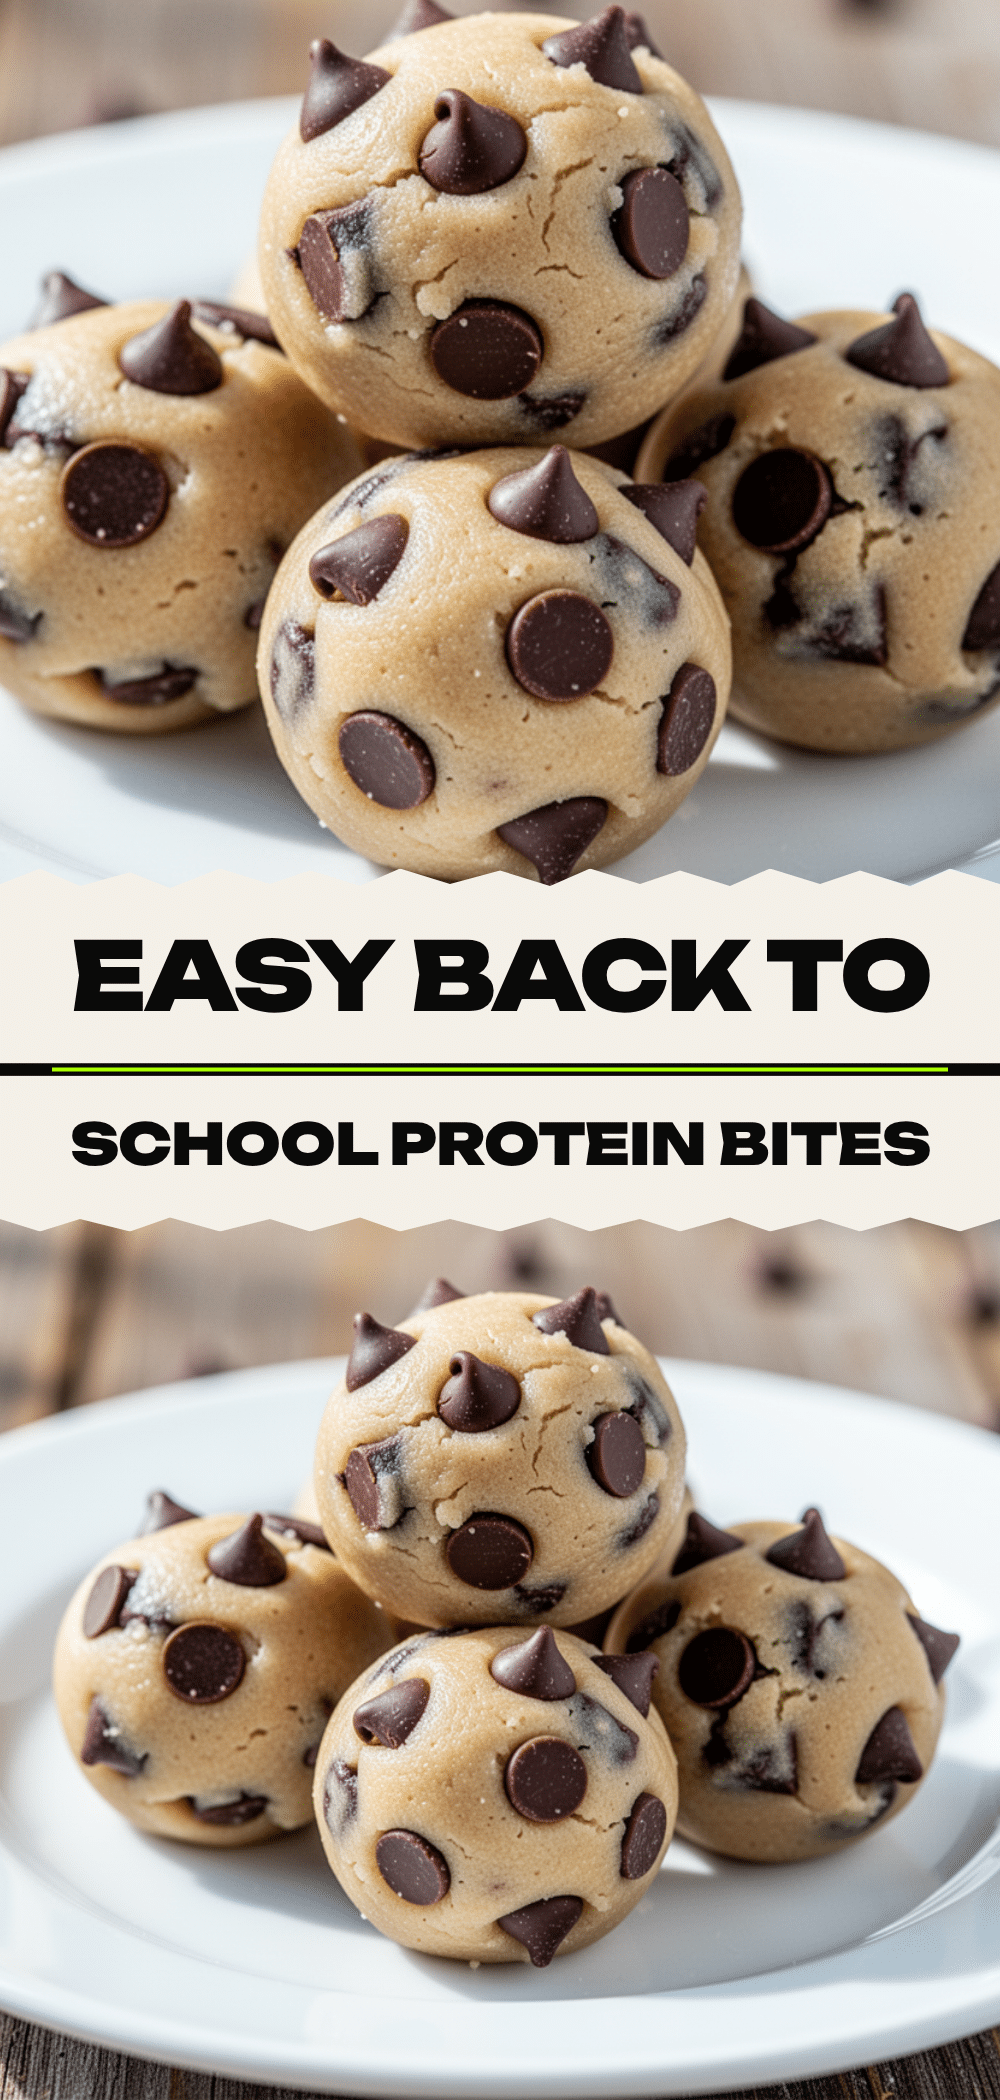

Back to School Protein Cookie Dough Bites
- Total Time: 20 minutes
- Yield: 20-24 servings 1x
Description
A no-bake, 5-minute breakfast or snack made with oats, peanut butter, and protein powder. These chewy bites are packed with protein and fiber, perfect for busy mornings.
Ingredients
- 2 cups old-fashioned rolled oats
- 1/2 cup creamy peanut butter
- 1/3 cup honey
- 1 teaspoon vanilla extract
- 1 scoop vanilla protein powder (whey or casein blend)
- 2 tablespoons chia seeds
- 1/4 teaspoon fine sea salt
- 1/2 cup mini chocolate chips
Instructions
- Measure all ingredients. If peanut butter is stiff, microwave for 10 seconds to soften.
- In a large mixing bowl, combine peanut butter, honey, and vanilla extract. Stir until smooth.
- Add oats, protein powder, chia seeds, and salt to the wet mixture. Stir until combined and the mixture resembles wet sand.
- Gently fold in the mini chocolate chips.
- Cover the bowl and chill in the refrigerator for at least 15 minutes (30 minutes is better) to firm up the dough.
- Scoop about 1 tablespoon of dough at a time and roll into balls between your palms. If sticky, wet hands slightly.
- Place balls on a parchment-lined baking sheet.
- Store in an airtight container in the fridge for up to 2 weeks or freeze for up to 3 months.
Notes
Do not use instant or steel-cut oats. Ensure protein powder is a blend for best texture. Chilling is crucial to prevent sticking. For nut-free schools, use sunflower seed butter.
- Prep Time: 5 minutes
- Cook Time: 0 minutes
- Category: Breakfast
- Cuisine: American
Nutrition
- Serving Size: 1 bite
- Calories: 110
- Sugar: 6
- Sodium: 50
- Fat: 5
- Saturated Fat: 1
- Carbohydrates: 12
- Fiber: 2
- Protein: 57
Keywords: protein bites, no bake, healthy breakfast, meal prep, gluten-free option, nut-free option, quick snacks, back to school


