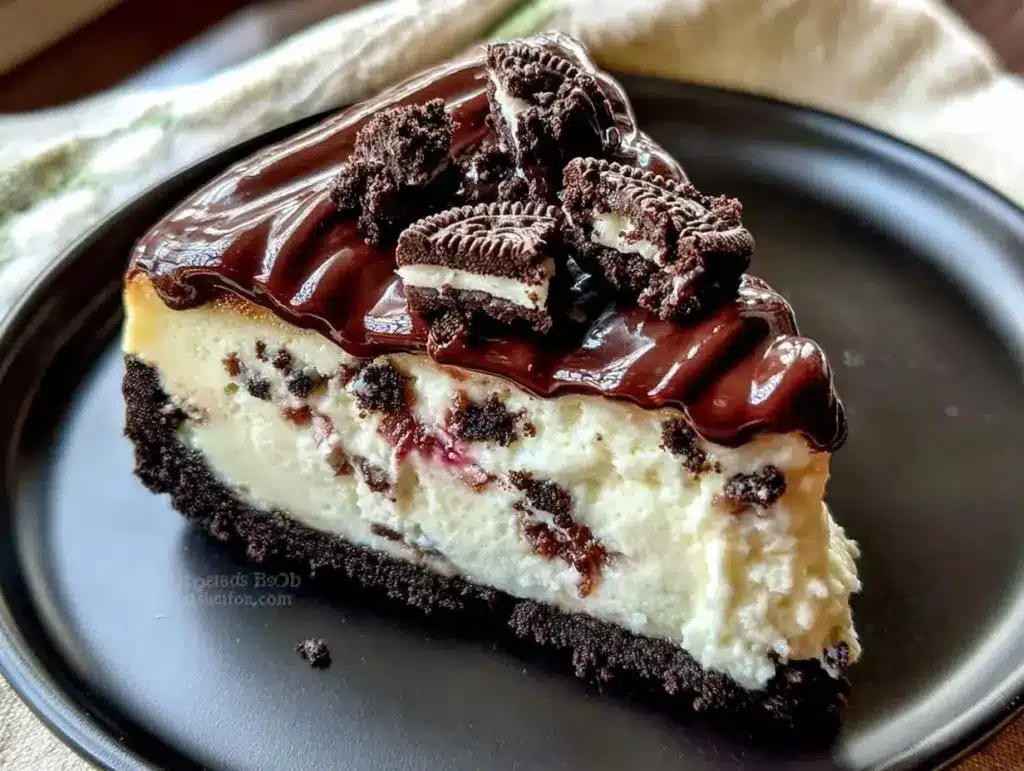
I have a confession to make. For years, I was terrified of the oven. Not because I was afraid of getting burned (though I’ve had my share of charred fingertips), but because I hated the heat. I hated the sweat dripping down my back while I waited for a cake to rise. I hated the fact that if I opened the door too early, my entire dessert would collapse like a deflated balloon. So, for a long time, I stuck to savory dishes. You might know my easy meatloaf with brown gravy is a staple, or that my slow cooker honey garlic chicken is a weeknight lifesaver. But desserts? Those were always takeout or store-bought. Until last summer.
Last July, I was hosting a dinner party for about twelve people. It was supposed to be a low-key affair. I had planned a roast, some salads, and… nothing for dessert. I panicked around 4 PM. The oven was already hot from the roast, and I didn’t want to deal with baking in a sweltering kitchen. That’s when I remembered a recipe I’d saved months ago but never tried: the No-Bake Oreo Cheesecake with Chocolate Ganache. I figured, worst case scenario, I’d serve fruit platters. Best case? Maybe I’d finally conquer my oven-phobia without turning on the oven.
I didn’t turn on the oven. And let me tell you, that first bite changed everything. The crust was crunchy and buttery, the filling was impossibly smooth and tangy, and that chocolate ganache? It was like silk. My guests didn’t just ask for the recipe; they asked if I’d consider opening a bakery. I’ve made the No-Bake Oreo Cheesecake with Chocolate Ganache at least fifteen times since then. Sometimes for big parties, sometimes just because I needed a hug in dessert form. It’s become my secret weapon for impressing people without sweating over a hot stove.
There’s something magical about this specific dessert. It’s not just “easy.” It’s luxurious. It tastes like you spent hours in the kitchen, but you really just spent ten minutes mixing and a few hours waiting. If you’re looking for a dessert that looks stunning on a buffet table or feels like a special treat for a cozy night in, this is it. I’m going to walk you through exactly how I make it, including the little tricks that keep the layers distinct and the ganache glossy. Let’s get into it.
Why You’ll Love This No-Bake Oreo Cheesecake
Real talk: most no-bake cheesecakes are a bit… sad. They’re often too soft, too sweet, or lack that rich cheesecake tang. This one is different. I’ve tweaked the ratios until it’s perfect. Here’s why this No-Bake Oreo Cheesecake with Chocolate Ganache has earned a permanent spot in my rotation.
Zero Oven Required — This is the biggest selling point. Whether it’s 90 degrees outside or you just don’t want to heat up your kitchen on a winter night, this recipe requires absolutely no baking. You mix, you chill, you eat. It’s perfect for summer gatherings or lazy weekends.
Restaurant-Quality Texture — I’ve tried recipes that turn out grainy or runny. By using full-fat cream cheese and whipping it correctly, this filling sets firm but stays creamy. It holds its shape when sliced, meaning you get those beautiful, clean layers in every piece. No crumbling mess.
The Crunch Factor — The crust isn’t just crushed cookies. I fold whole Oreo pieces into the crust mixture, so every bite has a satisfying crunch against the smooth filling. It adds a textural element that makes it feel premium, not like a quick snack.
Make-Ahead Friendly — This is the ultimate stress-buster. You can make this two days in advance. In fact, I find it tastes even better on day two because the flavors have had time to meld. It sits in the fridge while you go live your life, ready to shine when guests arrive.
Visual Drama — Let’s be honest, we eat with our eyes first. The stark white of the cheesecake, the dark brown of the Oreo crust, and the glossy black chocolate ganache on top? It looks incredible. It’s elegant enough for a holiday table but fun enough for a birthday party. People will ask what kind of magic you used.
Customizable Sweetness — Oresos are sweet, but the cream cheese balances it. If you prefer less sweet, you can reduce the powdered sugar slightly. If you’re a sugar lover, add a dollop of whipped cream on top. This recipe is forgiving and flexible.
This is my go-to when dinner needs to just work, but you want to serve something that feels special. It’s indulgent, it’s reliable, and it’s absolutely delicious.
Key Ingredients for the Perfect Cheesecake
You don’t need fancy, hard-to-find ingredients for this. In fact, the beauty of the No-Bake Oreo Cheesecake with Chocolate Ganache is how simple it is. But quality matters. Here’s what you need and why.
Full-Fat Cream Cheese (32 oz / 900g) — Do not buy the low-fat or whipped versions. You need blocks of full-fat cream cheese, softened to room temperature. This is non-negotiable for that rich, dense texture. If it’s too cold, you’ll get lumps. If it’s melted, it won’t set. I take it out of the fridge about an hour before starting.
Heavy Whipping Cream (2 cups / 480ml) — This provides the airiness and structure. Make sure it’s cold! Whip it to stiff peaks. If it’s warm, it won’t hold the shape, and your cheesecake will be soupy. I keep a carton in the back of my fridge specifically for desserts.
Oreo Cookies (24 cookies / 240g) — For the crust, you need the classic black and white Oreos. I use about 24 cookies. Don’t skimp on the butter in the crust; it needs to be moist enough to hold together but not soggy. For the filling, I reserve about 12 cookies, broken into pieces, to fold in later.
Unsalted Butter (1/2 cup / 113g) — For the crust, you’ll melt this. Using unsalted allows you to control the saltiness, especially since Oreos already contain some salt.
Powdered Sugar (1 cup / 120g) — This dissolves easily into the cream cheese mixture. Granulated sugar won’t melt fully in a no-bake recipe, leaving you with a gritty texture. Sift it if it’s clumpy.
Vanilla Extract (2 tsp / 10ml) — Use pure vanilla extract, not imitation. It adds that warm, comforting aroma that ties the chocolate and cream together. Just a splash goes a long way.
Dark Chocolate Chips (1 cup / 170g) — For the ganache, I prefer semi-sweet or dark chocolate chips. They have a richer flavor than milk chocolate and cut through the sweetness of the cheesecake. Ghirardelli or Lindt are my go-to brands for a smooth melt.
Heavy Cream (for Ganache) (1/2 cup / 120ml) — You need hot heavy cream to melt the chocolate chips. This creates that glossy, pourable sauce. Don’t use milk; it won’t be rich enough.
Salt (1/4 tsp) — A pinch of salt in the ganache and crust enhances the chocolate flavor. It’s the secret ingredient that makes it taste “bakeries,” not just homemade.
Tools Needed
You don’t need fancy equipment. Here’s what I use to make this No-Bake Oreo Cheesecake with Chocolate Ganache smoothly.
9-Inch Springform Pan — This is essential. The sides pop off, making it easy to remove the cake without damaging it. If you don’t have one, a 9-inch round cake pan lined with parchment paper works, but presentation suffers.
Stand Mixer or Hand Mixer — You can use a whisk, but it will take forever. An electric mixer ensures the cream cheese is smooth and the whipped cream holds its peaks. I use my stand mixer with the paddle attachment for the filling.
Food Processor or Blender — For crushing the cookies. A food processor is fastest, giving you uniform crumbs. If you don’t have one, put the cookies in a zip-top bag and crush them with a rolling pin. It takes arm strength, but it works.
Large Mixing Bowls — You’ll need one large bowl for the filling and another for whipping the cream. Make sure they’re clean and dry.
Spatula — A silicone spatula is best for folding in the whipped cream and the cookie pieces. You want to be gentle to keep the air in the mixture.
Piping Bag (Optional) — If you want those professional-looking swirls of ganache or whipped cream on top, a piping bag helps. But honestly, a spoon works fine if you’re keeping it rustic.
How to Make It
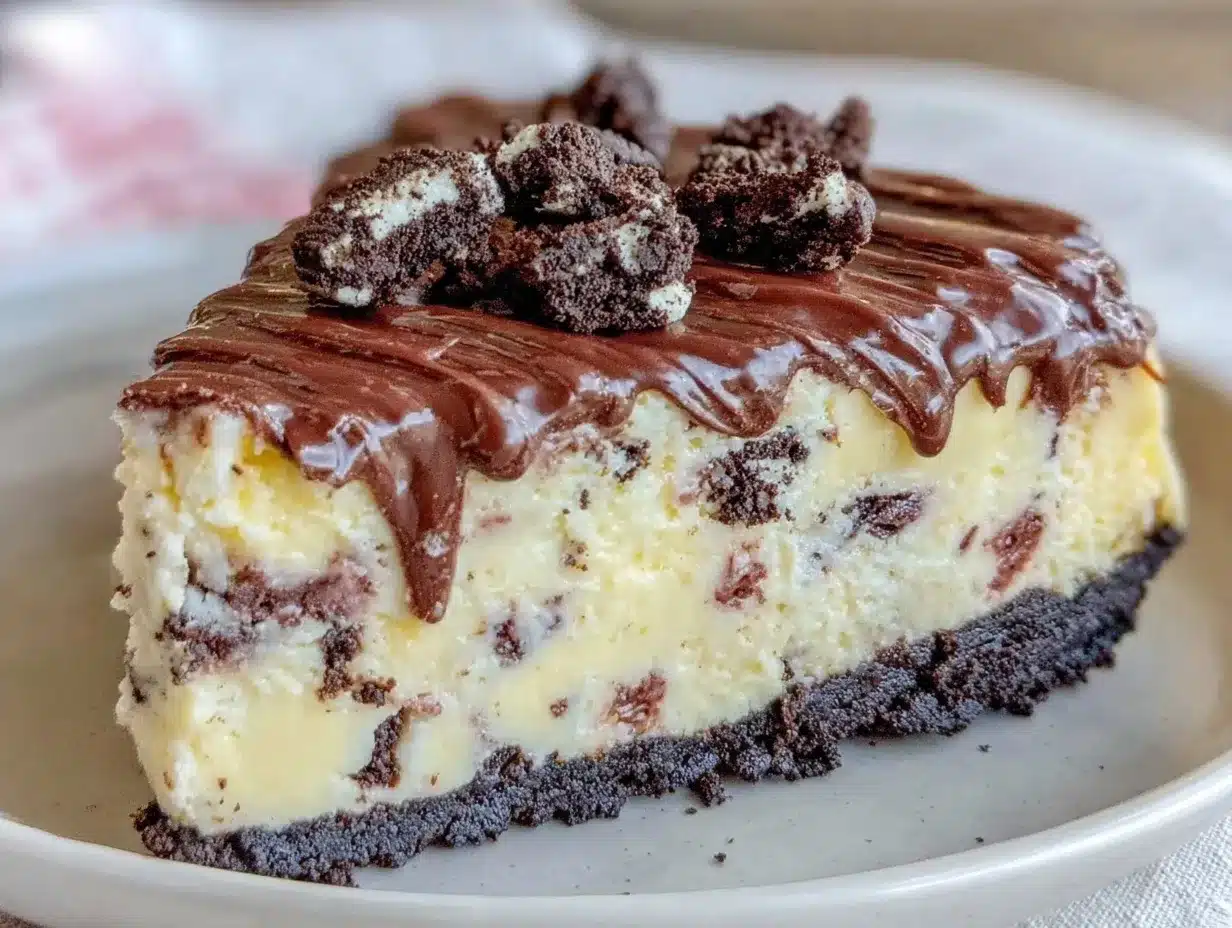
Let’s make this! I’m walking you through exactly how I do it. It’s straightforward, but timing is key.
Step 1: Prepare the Crust (10 minutes)
First, crush your Oreos. I use 24 cookies for the crust. Pulse them in a food processor until they’re fine crumbs. If you’re doing it by hand, put them in a bag and crush until they look like wet sand. Melt your 1/2 cup of unsalted butter. Mix the butter with the crumbs until it looks like wet sand. Press this mixture firmly into the bottom of your springform pan. Use the bottom of a glass to pack it down tight. You want a solid base. Pop it in the fridge while you make the filling. This helps it set faster.
Step 2: Whip the Cream (5 minutes)
In a large, cold bowl, pour your 2 cups of heavy whipping cream. Whip it on medium-high speed until you see stiff peaks. This means when you lift the beaters, the cream stands up straight. Don’t over-whip it into butter, just stop when it holds its shape. Set this aside.
Step 3: Make the Filling Base (5 minutes)
In your stand mixer (or a large bowl with a hand mixer), beat the softened 32 oz of cream cheese on medium speed until it’s completely smooth and creamy. Scrape down the sides of the bowl. Add the 1 cup of powdered sugar and 2 tsp of vanilla extract. Beat on low until combined, then increase to medium for another minute. The mixture should be pale and fluffy. Taste it. It should be sweet but tangy.
Step 4: Fold It All Together (5 minutes)
Here’s the delicate part. Add one-third of the whipped cream to the cream cheese mixture and fold it in gently with a spatula. This lightens the dense cheese. Then, add the rest of the whipped cream and fold until just combined. Do not overmix! You want to keep the air in there. Break 12 whole Oreos into quarters or halves and fold them into the filling. Distribute them evenly. This gives you those lovely cookie chunks in every bite.
Step 5: Assemble and Chill (4+ hours)
Pour the filling over the crust in the springform pan. Smooth the top with your spatula. Tap the pan gently on the counter to remove air bubbles. Cover it tightly with plastic wrap. Refrigerate for at least 4 hours, but overnight is best. I usually make this the night before a party. The cake needs this time to firm up completely.
Step 6: Make the Chocolate Ganache (10 minutes)
Once the cake is set, it’s time for the ganache. Heat 1/2 cup of heavy cream in a small saucepan until it just starts to simmer (small bubbles around the edges). Pour the hot cream over 1 cup of dark chocolate chips in a heatproof bowl. Let it sit for 2 minutes without touching it. Then, stir gently from the center outwards until the chocolate is melted and the mixture is glossy and smooth. Add a pinch of salt.
Step 7: The Final Touch (5 minutes)
Remove the cheesecake from the fridge. Pour the warm ganache over the center of the cake. Use an offset spatula or the back of a spoon to spread it to the edges. Let it drip down the sides slightly for a rustic look. Return it to the fridge for 30 minutes to let the ganache set. Then, release the springform pan. Slice with a warm knife for clean cuts.
Total active time is about 30 minutes, but you need 4-5 hours of chill time. Plan accordingly!
Expert Tips from My Kitchens
Here’s everything I learned from making this too many times. These tips will save you from common mistakes.
Cream Cheese Must Be Room Temperature
This is the #1 mistake. If your cream cheese is cold, you’ll get lumps that won’t disappear. I learned this the hard way when I rushed and my cheesecake looked speckled. Take it out 1-2 hours before. If you’re short on time, microwave it in 10-second bursts, but don’t let it melt.
Don’t Overmix the Whipped Cream
When folding the whipped cream into the cheese, be gentle. Use a cutting motion with your spatula. If you stir vigorously, you’ll deflate the air, and your cheesecake will be dense and heavy instead of light and fluffy.
Use a Warm Knife for Slicing
Cold cheesecake is hard to cut cleanly. Dip your knife in hot water, wipe it dry, and make your cut. Wipe it again between slices. This ensures you get those perfect, beautiful layers showing the crust, the filling, and the ganache.
Chill Your Bowls
If you want your whipped cream to whip faster and hold better, put your mixing bowl and beaters in the freezer for 15 minutes before starting. Cold equipment = stiffer peaks.
Ganache Temperature Matters
Don’t pour cold ganache on the cake; it will seize and become grainy. Don’t pour boiling hot ganache; it might melt the top layer of the cheesecake. Wait until it’s warm and pourable, like melted honey.
Recipe Variations
Once you’ve nailed the basic version, here’s how to mix it up. The base is very forgiving.
Strawberry Oreo Cheesecake
Swap the chocolate ganache for a fresh strawberry puree. Blend 1 cup of strawberries with 2 tbsp sugar and a splash of lemon juice. Strain out the seeds. Pour over the set cheesecake. The red and white contrast is stunning.
Double Chocolate
Use chocolate Oreos for the crust and folding pieces. Use milk chocolate chips for the ganache. This is for the serious chocolate lovers. It’s incredibly rich.
Cookie Butter Version
Mix 2 tbsp of Biscoff spread into the cream cheese mixture. Drizzle extra Biscoff sauce over the top instead of ganache. This tastes like a cookie in dessert form.
Gluten-Free Option
Simply use gluten-free Oreos or any gluten-free chocolate sandwich cookies. The rest of the ingredients are naturally gluten-free, so this works perfectly.
Low-Sugar Adaptation
Use a powdered erythritol or monk fruit sweetener instead of sugar. For the cream cheese, ensure it’s unsweetened. You’ll need to taste and adjust, as artificial sweeteners can have a different aftertaste. I haven’t tested this extensively, so proceed with caution.
Serving & Storage
Serving:
I serve this plain, but you can add whipped cream rosettes on top for extra flair. It pairs beautifully with a hot coffee or a glass of cold milk. For a dinner party, I cut it into small squares. It’s rich, so people usually only eat one or two pieces. It looks amazing on a tiered dessert stand.
Storage:
This keeps well in the refrigerator for up to 5 days. Cover it tightly with plastic wrap or keep it in the springform pan with the lid on. It does not freeze well. The texture of the cream cheese and whipped cream changes when frozen and thawed; it can become grainy or watery. So, only make what you’ll eat within the week.
Meal Prep Tip:
If you’re making this for a party, make it two days ahead. The flavors deepen, and it’s easier to slice when it’s fully chilled. Just bring it to the room temperature for 15 minutes before serving so the flavors are at their peak.
Nutrition Information
I’m not a nutritionist, but here’s the breakdown. This is a rich dessert, so portion control is key.
Per serving (1/12th of the cake):
| Nutrient | Amount |
|---|---|
| Calories | 450 kcal |
| Protein | 6g |
| Carbs | 42g |
| Fiber | 2g |
| Fat | 28g |
| Sodium | 320mg |
My Take:
This is indulgent comfort food. It has cream, cheese, sugar, and chocolate. It’s not diet food. But it’s better than takeout, and you know exactly what’s in it. Enjoy it as a special treat, not an everyday snack.
Final Thoughts
The No-Bake Oreo Cheesecake with Chocolate Ganache is more than just a recipe. It’s a confidence booster. It’s proof that you can create something beautiful and delicious without spending hours in the kitchen. Whether you’re hosting a dinner party or just treating yourself after a long week, this dessert delivers. It’s creamy, crunchy, and chocolatey perfection.
If you make this, drop a comment! I love hearing how it turns out in your kitchen. Did you add extra cookies? Try a different ganache? Let me know. Happy cooking!
FAQs
Can I use whipped cream cheese instead of blocks?
No. Whipped cream cheese has air added to it and often contains stabilizers. It won’t give you the dense, creamy texture you need. You must use block cream cheese.
Why did my ganache separate?
This usually happens if the cream was too hot when poured, or if you stirred too vigorously. Let the chocolate sit for 2 minutes before stirring. Stir slowly and gently. If it separates, add a tablespoon of cold heavy cream and whisk gently to bring it back together.
Can I make this in a pie dish?
Yes, but the layers will be thinner. You’ll need to adjust the chilling time. It might set faster, but it will be harder to slice cleanly. A springform pan is best for presentation.
How do I get clean slices?
Use a sharp knife. Dip it in hot water and wipe it dry before every cut. This prevents the cold cheesecake from sticking and tearing the layers.
Can I freeze this cheesecake?
I don’t recommend it. The texture of the whipped cream and cream cheese changes when frozen. It’s best enjoyed fresh from the fridge.
What if I don’t have a food processor?
Put the Oreos in a sturdy zip-top bag. Use a rolling pin, meat mallet, or heavy pan to crush them. It takes a bit of elbow grease, but it works perfectly.
Can I make this dairy-free?
Yes, but the texture will be different. Use dairy-free cream cheese (like Kite Hill) and coconut cream instead of heavy cream. Coconut cream can have a distinct flavor, so taste your filling before adding sugar.
Pin This Recipe!
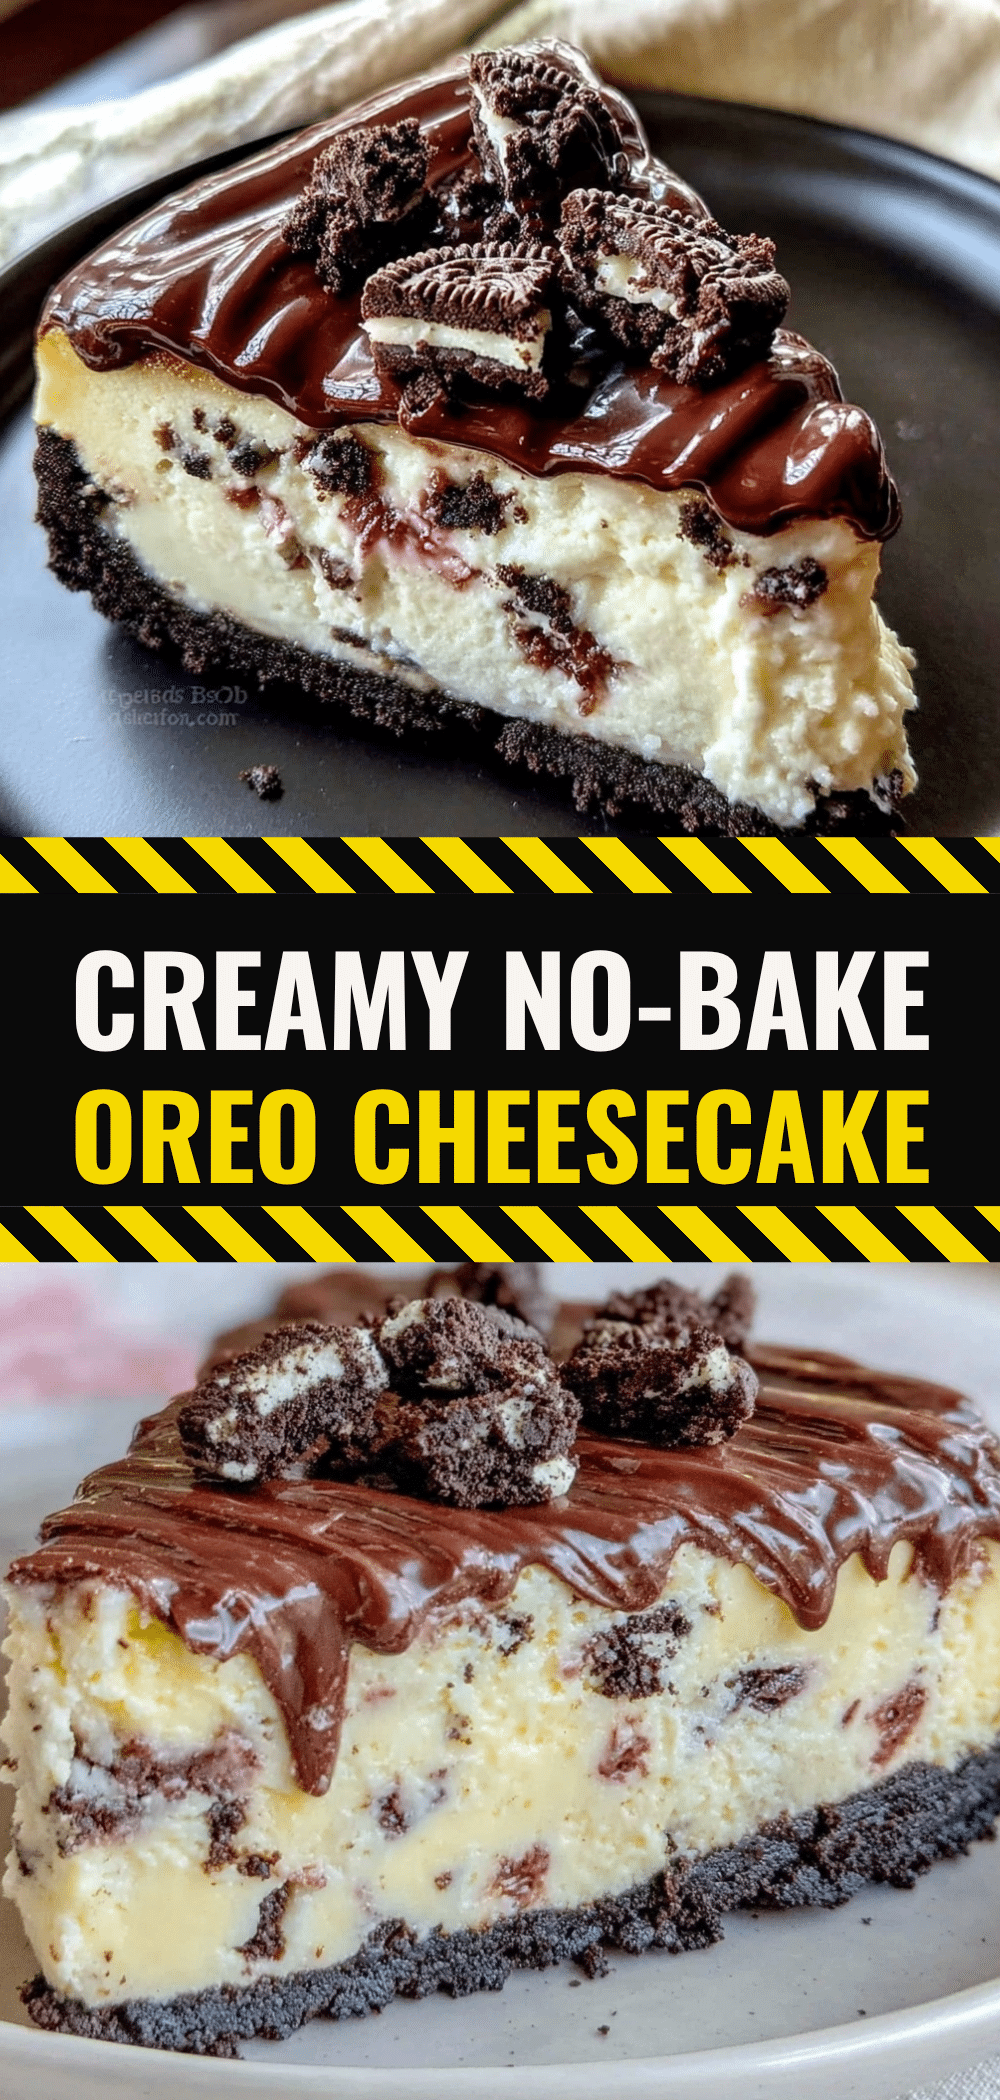
No-Bake Oreo Cheesecake with Chocolate Ganache
- Total Time: 4 hours 30 minutes
- Yield: 12 servings 1x
Description
A luxurious, no-bake dessert featuring a crunchy Oreo crust, a smooth and tangy cream cheese filling with whole cookie pieces, and a glossy dark chocolate ganache topping. Perfect for parties or special occasions.
Ingredients
- 32 oz (900g) full-fat cream cheese, softened to room temperature
- 2 cups (480ml) heavy whipping cream, cold
- 24 Oreo cookies (240g), divided (24 for crust, 12 reserved for filling)
- 1/2 cup (113g) unsalted butter, melted
- 1 cup (120g) powdered sugar
- 2 tsp pure vanilla extract
- 1 cup (170g) dark or semi-sweet chocolate chips
- 1/2 cup (120ml) heavy cream (for ganache)
- 1/4 tsp salt
Instructions
- Crush 24 Oreo cookies into fine crumbs using a food processor or by placing them in a zip-top bag and crushing with a rolling pin.
- Melt the 1/2 cup of unsalted butter and mix it with the cookie crumbs until the texture resembles wet sand.
- Press the crust mixture firmly into the bottom of a 9-inch springform pan. Use the bottom of a glass to pack it down tight. Refrigerate while making the filling.
- In a large, cold bowl, whip the 2 cups of heavy cream on medium-high speed until stiff peaks form. Set aside.
- In a stand mixer or large bowl, beat the softened cream cheese on medium speed until smooth. Scrape down the sides.
- Add the powdered sugar and vanilla extract to the cream cheese. Beat on low until combined, then increase to medium for one minute until pale and fluffy.
- Gently fold one-third of the whipped cream into the cream cheese mixture to lighten it. Add the remaining whipped cream and fold until just combined. Do not overmix.
- Break 12 reserved Oreo cookies into quarters or halves and fold them into the filling, distributing them evenly.
- Pour the filling over the chilled crust in the springform pan. Smooth the top and tap the pan gently to remove air bubbles.
- Cover tightly with plastic wrap and refrigerate for at least 4 hours, preferably overnight, until firm.
- To make the ganache, heat the 1/2 cup of heavy cream in a saucepan until it just starts to simmer.
- Pour the hot cream over the chocolate chips in a heatproof bowl. Let sit for 2 minutes, then stir gently from the center outward until smooth and glossy. Add salt.
- Remove the cheesecake from the fridge. Pour the warm ganache over the center and spread to the edges, allowing it to drip down the sides.
- Refrigerate for 30 minutes to set the ganache. Release the springform pan and slice with a warm, dry knife for clean cuts.
Notes
[‘Cream cheese must be softened to room temperature to avoid lumps.’, ‘Chill your mixing bowl and beaters in the freezer for 15 minutes before whipping cream for better results.’, ‘Do not overmix the whipped cream when folding, or the cheesecake will be dense.’, ‘Use a warm knife dipped in hot water and wiped dry for clean slices.’, ‘This cheesecake does not freeze well; the texture may become grainy or watery upon thawing.’, ‘Store in the refrigerator for up to 5 days.’]
- Prep Time: 30 minutes
- Cook Time: 0 minutes
- Category: Dessert
- Cuisine: American
Nutrition
- Serving Size: 1/12th of the cake
- Calories: 450
- Sugar: 32
- Sodium: 320
- Fat: 28
- Saturated Fat: 17
- Carbohydrates: 42
- Fiber: 2
- Protein: 6
Keywords: no-bake cheesecake, Oreo dessert, chocolate ganache, easy dessert, party dessert, summer dessert, make-ahead dessert


